
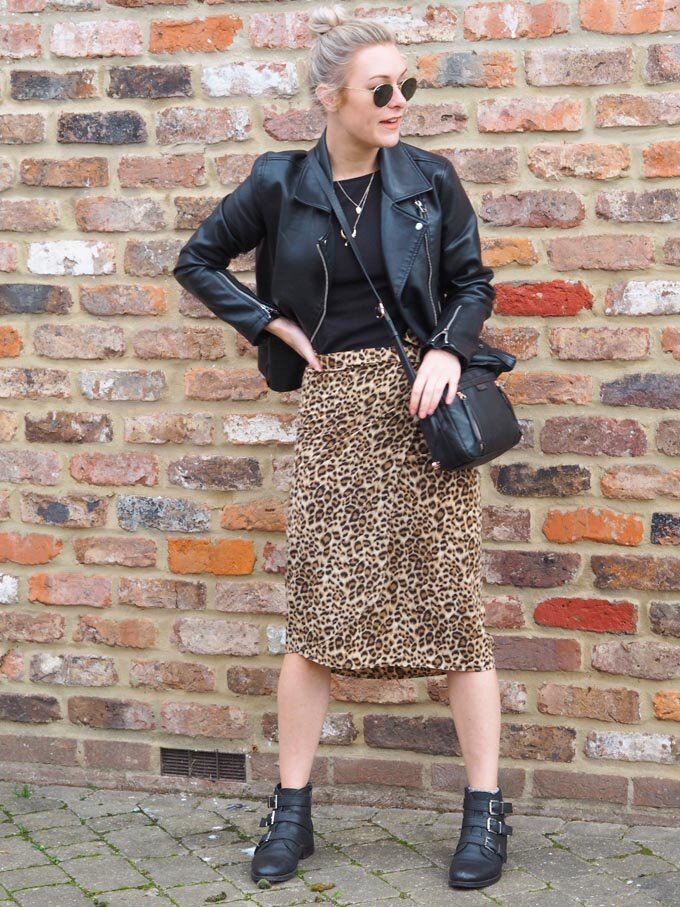
It’s been an age since I shared a fashion DIY with you guys. With animal print dominating the high street this season, I thought I’d show you how to make your own DIY leopard print skirt. Working in the textile industry, I’m naturally drawn to beautiful prints and leopard print is one of those classic designs that never goes out of style.
Here’s how I made my DIY leopard print skirt…

Materials:
1 meter of fabric (Ebay, £4.60 per half meter)
Interfacing
Scissors/thread/pins/tape measure
Sewing machine
Iron
I was chuffed to find this soft silky fabric on Ebay for a fraction of the cost of some high street garms. When it arrived I was really happy with the quality and look of the fabric .
To start making my DIY leopard print skirt, I laid out my fabric on the floor with the right side facing up. I then cut two long strips off the long side of the fabric. Each strip measured approx 8cm, these make up the waist band. I then put these strips to one side.
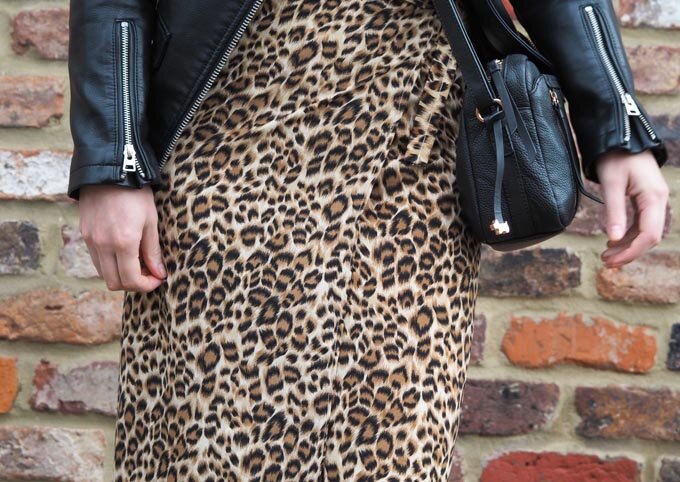
To give my skirt a bit of shape, I rounded off one corner of the larger section of fabric. After that I hemmed all the way around the side and bottom of the skirt, with a 0.5cm turnover.


To give the waistband a bit of structure, I used an iron on interfacing on the back of each strip. Once the interface was secure, I placed right sides together, pinned and sewed the two strips to make one long strip. The waistband was twice as long as the skirt edge. I then attached the waistband to the skirt.


To attach the waistband to the skirt, I sewed a small hem along each edge of my waistband. Before ‘trapping’ the main skirt section by folding the strip over length ways along the top. I left an even amount of waist band at each end of the skirt to make the ties.
Next was the fun bit of trying the skirt on. I wrapped the skirt around my waist and marked on where I thought I needed a gap for my ties to pass through. Having made the mark, I took the skirt off and cut and sewed an opening like below.


Done!
I’m really happy with how my DIY leopard print skirt turned out. The fabric feels lovely and light and the print is so cool! I love the curved detailing at the front, as it gives the skirt some movement and shape.
If I made this skirt again, I’d probably create the waistband in a different way. Instead creating a long tube then turning it inside out before attaching the skirt. This would create less visible stitching, however might not be as structured. How would you make a wrap skirt?
Overall I think this skirt took me around 2-3 hours to create along with a few mistakes along the way! The great thing about it is it only uses 1 meter of fabric meaning I have an on trend wardrobe staple for autumn at a fraction of the highstreet cost. Win!
What do you think? Would you make your own DIY leopard print skirt?
Anna x
Fancy making something else?
Love this look! Wow!
xxx, Linda
http://bestwalletreview.com
Author
Thank you! I love it too!
Anna x