
As it’s the beginning of a brand new month, I thought I would share a really simple yet effective home DIY with you guys this weekend. These handmade copper and marble coasters will create a big impact on your coffee table and take no time at all to make.
Here’s how I made mine…

Materials:
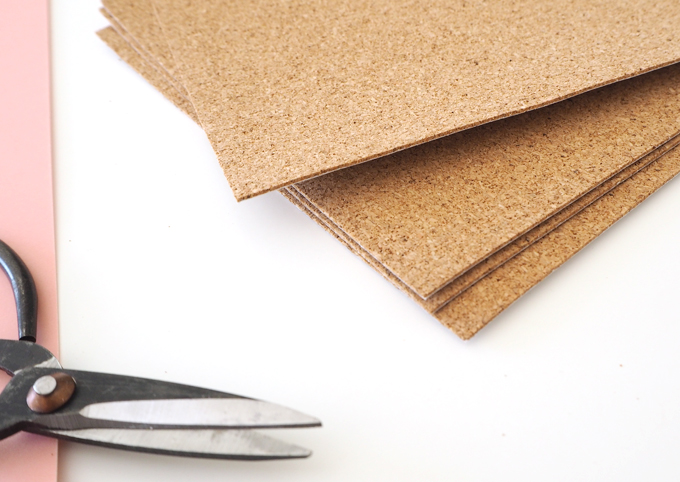
Cork Sheets or old coasters (I got craft sheets from The Range, but you could use ready made ones like these)
Marble Sticky Back Plastic (I got mine from Wilkos)
Metallic Spray Paint (Mine was from (Amazon)
Scrissors
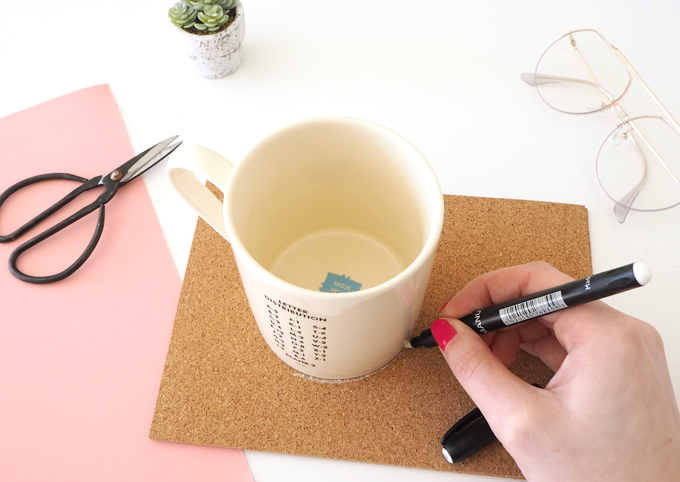
A mug to draw around
Marker Pen
Masking tape
The cork sheets I used were from The Range and came with a sticky backing, they were a little thin so I stuck 4 sheets together to create one thick sheet. Choosing a cork base for your coasters will stop your cup sliding about on the table, you could always upcycle some old coasters you have lying around the house too.
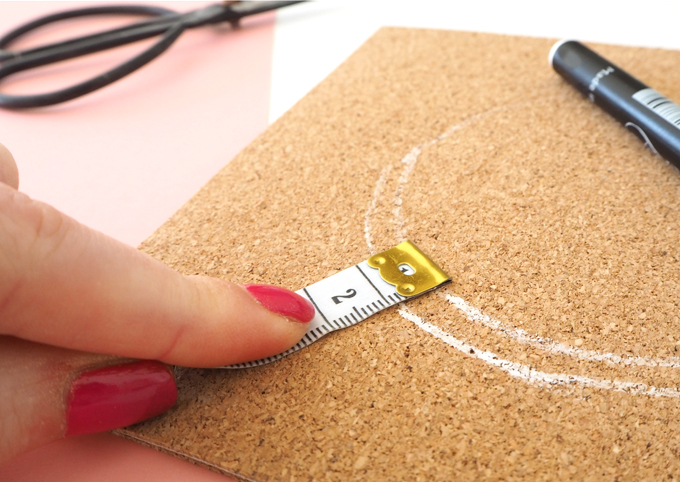
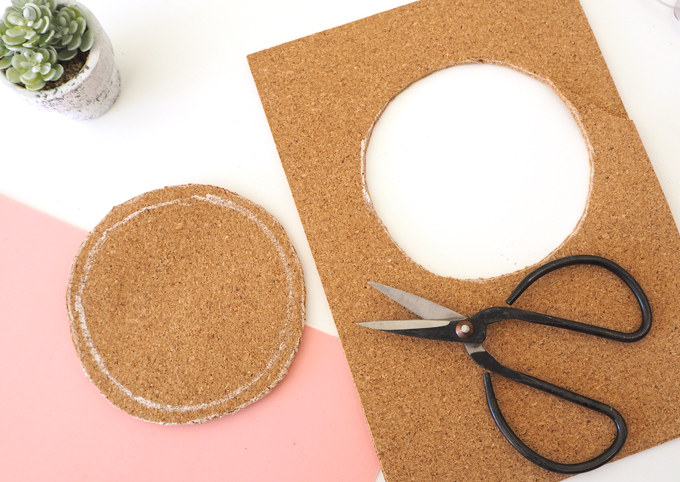
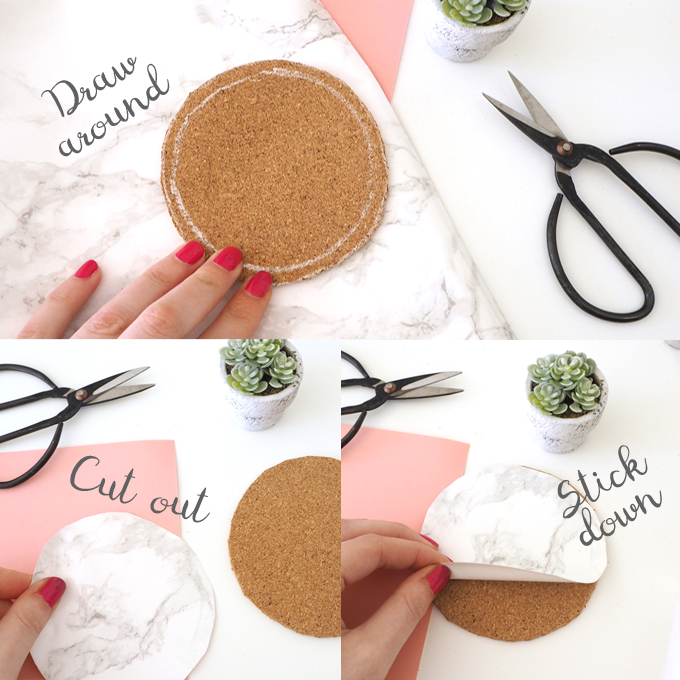
I started by drawing around the largest mug I have to get a good round shape. I then added on 1cm around the edge so there would be plenty of coaster for my mug to sit on. After that I cut out of my cork sheets following the outer circle line. Make as many as you like, I made 4 of these in total.
Next I grabbed some marble printed sticky back plastic, mine was from Wilkos for about £5 for a large roll. I used the cork coaster for a template to draw around and cut out some circles. The sticky back plastic was super easy to use, I just peeled off the backing and smoothed over the cork coaster, it stuck like a dream but don’t worry if you mess up first time, it is easy enough to slowly peel back and reapply.
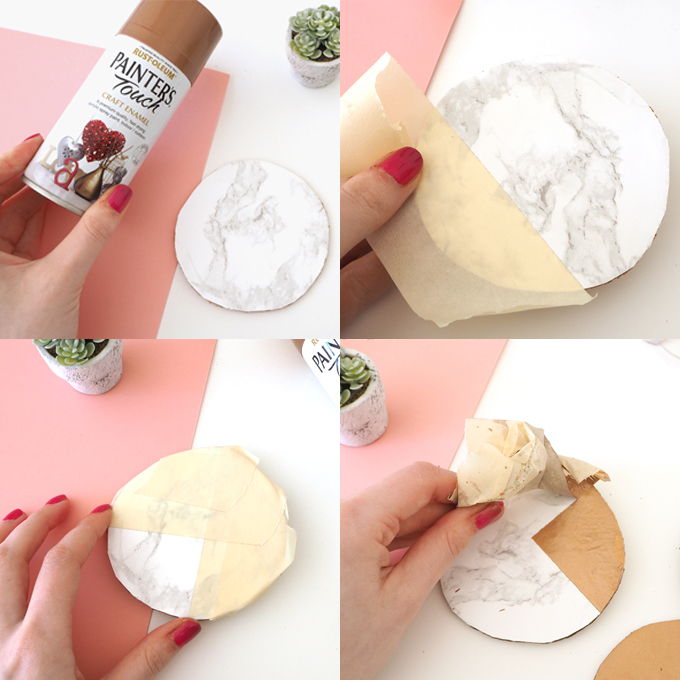
The next step is to spray areas to create a cool geometic pattern. I used a spray from Amazon which is great for craft projects like this as it dries super quick.
I started by masking off areas I didn’t want spraying with some masking tape, depending on the amount you mask off and the areas you choose, you will create different patterns on the coaster. Remember to make sure all edges of the tape are smoothed down to prevent the spray from getting under the tape. I took mine outside and sprayed them on some old newspaper to prevent any paint getting on the table in the house. Once I had sprayed all the areas I wanted to cover I let them dry for about 20 minutes before bringing them back inside and peeling off the masking tape.

And that’s it! Simple, right?
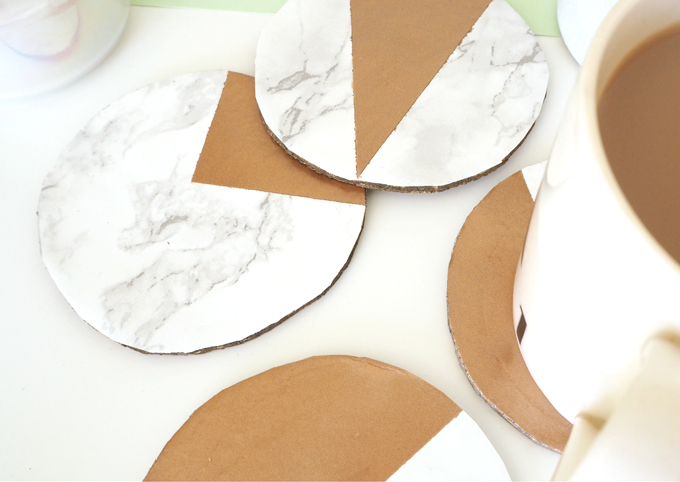
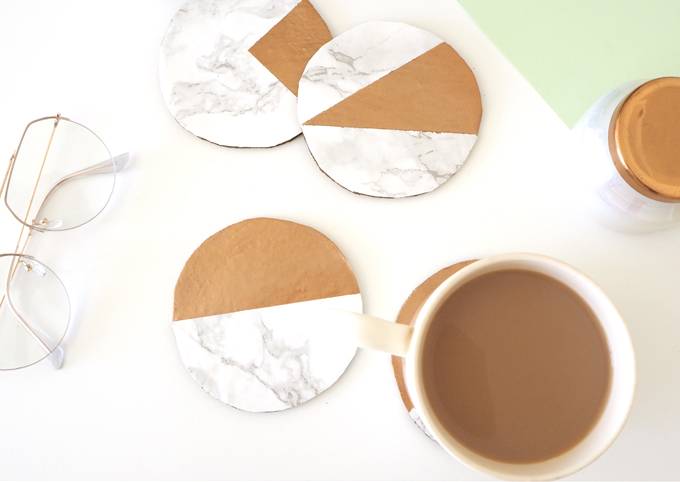
The coasters are ready to enjoy straight away and look great on any coffee table or desk!
If you don’t like seeing the cork around the edges, try using a gold sharpie pen to colour the edges in, like I did. You can make as many as you like in various shapes and patterns, why not try bright pops of colour to match your decor?

Pin for later?

Thanks for stopping by, I hope you have enjoyed this easy home DIY! What are you working on this weekend?
Anna
x