
I’m very excited to bring you day 4 of my #MadeUpFestive challenge. As you guys might know, I love a slogan top. So I thought what better way to win at Christmas jumper day this year than with my own DIY Christmas jumper? You might remember last year I made a pearl embellished jumper, well this year I’m up-cycling another plain jumper with a trend I’ve been loving this year.
From furry sleeves to fluffy handbags the faux fur trend has been massive this year. This easy but effective DIY combines this year’s hottest trend with a much loved Christmas tradition. So why not make your own DIY Christmas jumper? Here’s how…
You will need…
Plain sweatshirt
Faux fur material, 1/2 meter
Scissors
Fabric glue (or sewing machine)
Printer & paper (optional)


Creating your slogan
The first big decision to make is which kick ass slogan to have on your sweater. I went for something short and sweet, but if you’re stuck for ideas check out my Pinterest board for some DIY Christmas jumper ideas. Once you’ve decided which festive slogan you’d like on your jumper, print or sketch it out on a piece of A4 paper. I went for a large bold font which was easy to cut out and stretched it across the full width of paper.
Make sure the hairs on your fur faux material are running down smooth as you move your hand on the face. Cut out your letters and place onto the reverse of your fur fabric. Use the letters as templates to mark and cut out the fur letters.
Measure to find the center of the jumper and place your letters evenly across the middle. Apply a small, even amount of glue to the back of each letter, then press into place. Allow your glue to dry, usually for 24 hours before wearing.


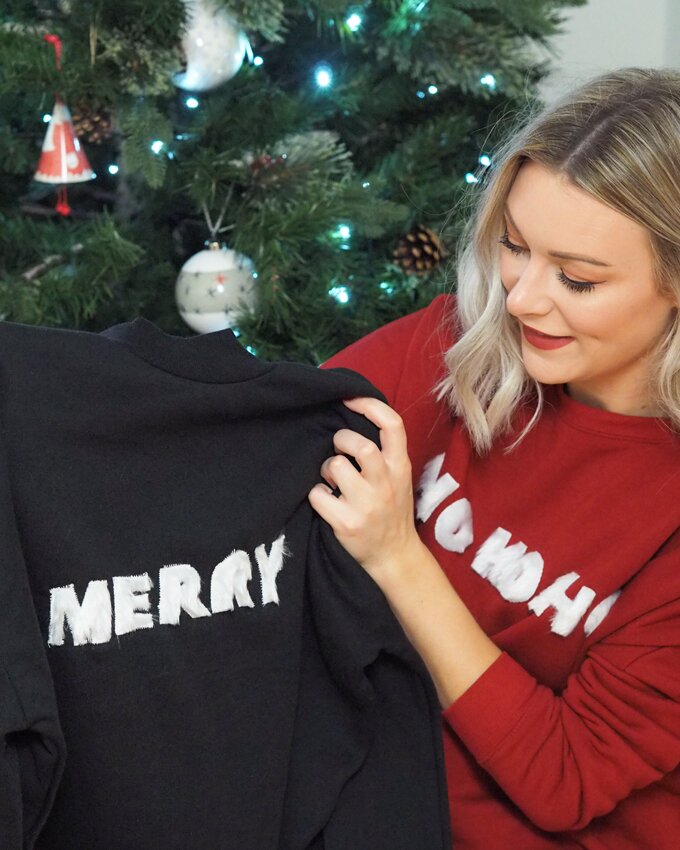
Top tip: If your slogan contains asymmetrical lettering (such as E and R), flip the templates over before drawing and cutting out the shape. This will mean they are the right way around when it comes to sticking them to your Christmas jumper. I did this on a second jumper I made spelling the word ‘Merry’.
Finishing off
Faux fur can be a messy bugger to work with, luckily working in textiles as my day job, I’ve picked up a few tricks to cleaning up after shedding fabric. Grab some wide sticky tape or masking tape and remove any stray hairs and fibers by patting your clothes with the sticky side. To stop the letters on your DIY Christmas jumper shedding further, give them a gentle brush them with your hand before lightly spraying them with some hairspray.
Try running a few stitches around each letter either on your sewing machine or by hand, for a little added security for your slogan.


Will you be making your own DIY Christmas Jumper this year?
I’m really happy with how my jumpers turned out, and I cant wait to wear them over the festive period. Let me know what words you would spell out on your christmas jumper. Leave me a comment below or message me over on Twitter and Instagram. And don’t forget to follow along using the hashtag #MadeUpFestive.
Anna x
Pin for later?

More festive DIY ideas…