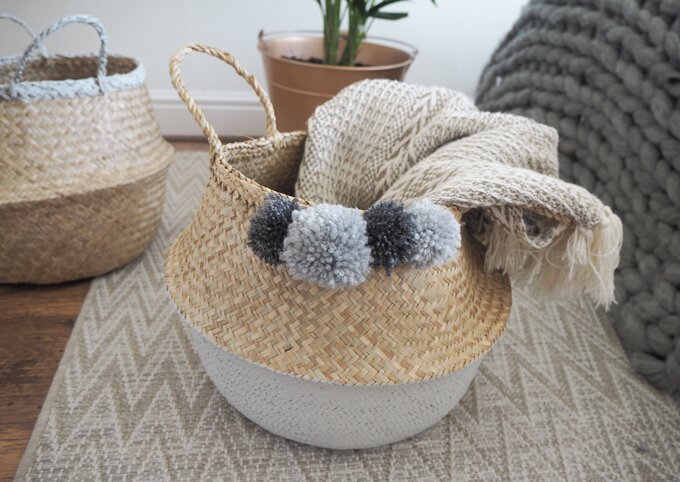
I’m always on the look out for an Ikea hack, so when I saw these seagrass baskets in store, I couldn’t wait to do a little DIY with them. Thanks to Pinterest, I have been wanting to add a few seagrass baskets to our home for a while but didn’t want to spend a fortune. These beauties from Ikea were £10 each and are just the right size and shape.
I picked up two as I plan to use one to store some throws in the guest room and I might use the other as a alternative to a planter in the bathroom. Although I love the woven seagrass material, I wanted to make them tie into our interior a little more so decided to paint them using some grey paint that we’ve used in other areas of the house.
Keep reading to see my DIY Ikea Fladis seagrass basket hack…

Materials:
Seagrass basket, Ikea
Paint, Rustoleum
Paint brush
Masking tape (optional)
Pom poms (optional)

On the first basket I wanted to add paint to the bottom part only, so used the center fold as a guide to paint up to.
To start, I turned the basket upside down on an even surface and began painting the bottom section. I started on the sides, applying a thin coat of paint before moving onto the circular bottom. I worked all the way around the basket making sure the paint was evenly covered before touching up the edge in the center. I left the top section and handles unpainted to create a cool, two tone effect. I didn’t use masking tape to section off the center line on this one as I liked the more rustic paint effect, so just used the ready made crease (and a steady hand) as a guide instead.
I then left it to dry upside down for about half an hour. I really like this paint, as it dries pretty fast and leaves a lovely chalky, matt texture to the surface afterwards. For the final touch I added a few pom poms to the top of my basket using a hot glue gun, to see how I make my pom poms check out my pom pom wreath tutorial here.


I wanted a more minimalist look when it came to painting the second basket so I decided to just paint around the rim and handles instead. For this one I sectioned off the areas I wanted to paint (a few centimeters below the rim) with a bit of masking tape before hand, so I could create a more even line. I then started to paint an layer all the way around the rim of the basket, I left the handles until last so I could use them to move my basket around whilst painting the rim without getting paint on my fingers. I decided to add a little paint inside the rim of the basket too, just to neaten it all up.
Once the paint was dry, all that was left to do was remove the masking tape strip and I was done!


What do you think? Which basket design is your favourite?
I really enjoyed adding a little detail to these storage baskets, and I can’t believe how quick and easy it was. Although they are super cute as they are it’s nice to tie them into the interior with a little bit of paint. If you fancy giving this DIY a go why not try using different colours too? I think they would look great with a pastel blue or blush pink paint to brighten up a room. Same goes for the pom poms, I have seen lots of beautiful baskets trimmed with colourful pom poms for a more morrocan market feel. Which would you go for?
Thanks for reading, happy DIYing…
Anna x
Fancy some more interior DIY’s?
These are gorgeous! Love the baskets and been thinking about getting some for myself. Had no idea they were so cheap in IKEA!! Love your photography and I have to ask, where is your chunky knit from?
Love Hannah xx
http://www.HannahHawes.com
Author
Thank you! I love Ikea for things like this! Bargain!
I made the chunky blanket, soo easy and fun! Here’s the tutorial and info you need if you want to buy something similar…
http://www.madeupstyle.com/2016/11/diy-arm-knitted-cosy-chunky-blanket.html
Anna xx
Love this what a good idea, I am also after a basket to use as a planter x
Katescloset.uk
Author
Thank you! Ooo yeh these are fab for that! Inexpensive and look sooooo good!
Anna xx